Cleaning an Air Filter for HVAC Efficiency
A plain-language guide for homeowners about cleaning an air filter for their home's HVAC unit, and getting it done right the first time
Before you touch anything, identify whether your filter is washable or disposable. These two types require completely different actions. Washing a disposable filter damages it. Throwing away a washable filter wastes money. One quick check of the filter frame or your owner's manual tells you everything you need to know. Once you know which type you have, the rest of this task takes about fifteen minutes and requires no special tools.
RESEARCH NOTE
The steps in this guide are based on manufacturer documentation, HVAC industry standards, and guidance published by the US Department of Energy for cleaning an air filter. Filter designs vary by system, brand, and home layout. Always verify the steps against your specific unit's manual before proceeding. This guide is researched and curated, not based on personal testing of every system type.
SECTION 1: KNOW EXACTLY WHICH FILTER YOU HAVE BEFORE YOU DO ANYTHING
Why this step comes first
Most homeowners skip straight to pulling out the filter and figure it out from there. That approach works until it does not. If you wash a disposable filter, the media collapses, the filter loses its ability to catch particles, and you may end up pushing debris into your blower instead of catching it. If you replace a washable filter every month because you assumed it was disposable, you are spending money you do not need to spend.
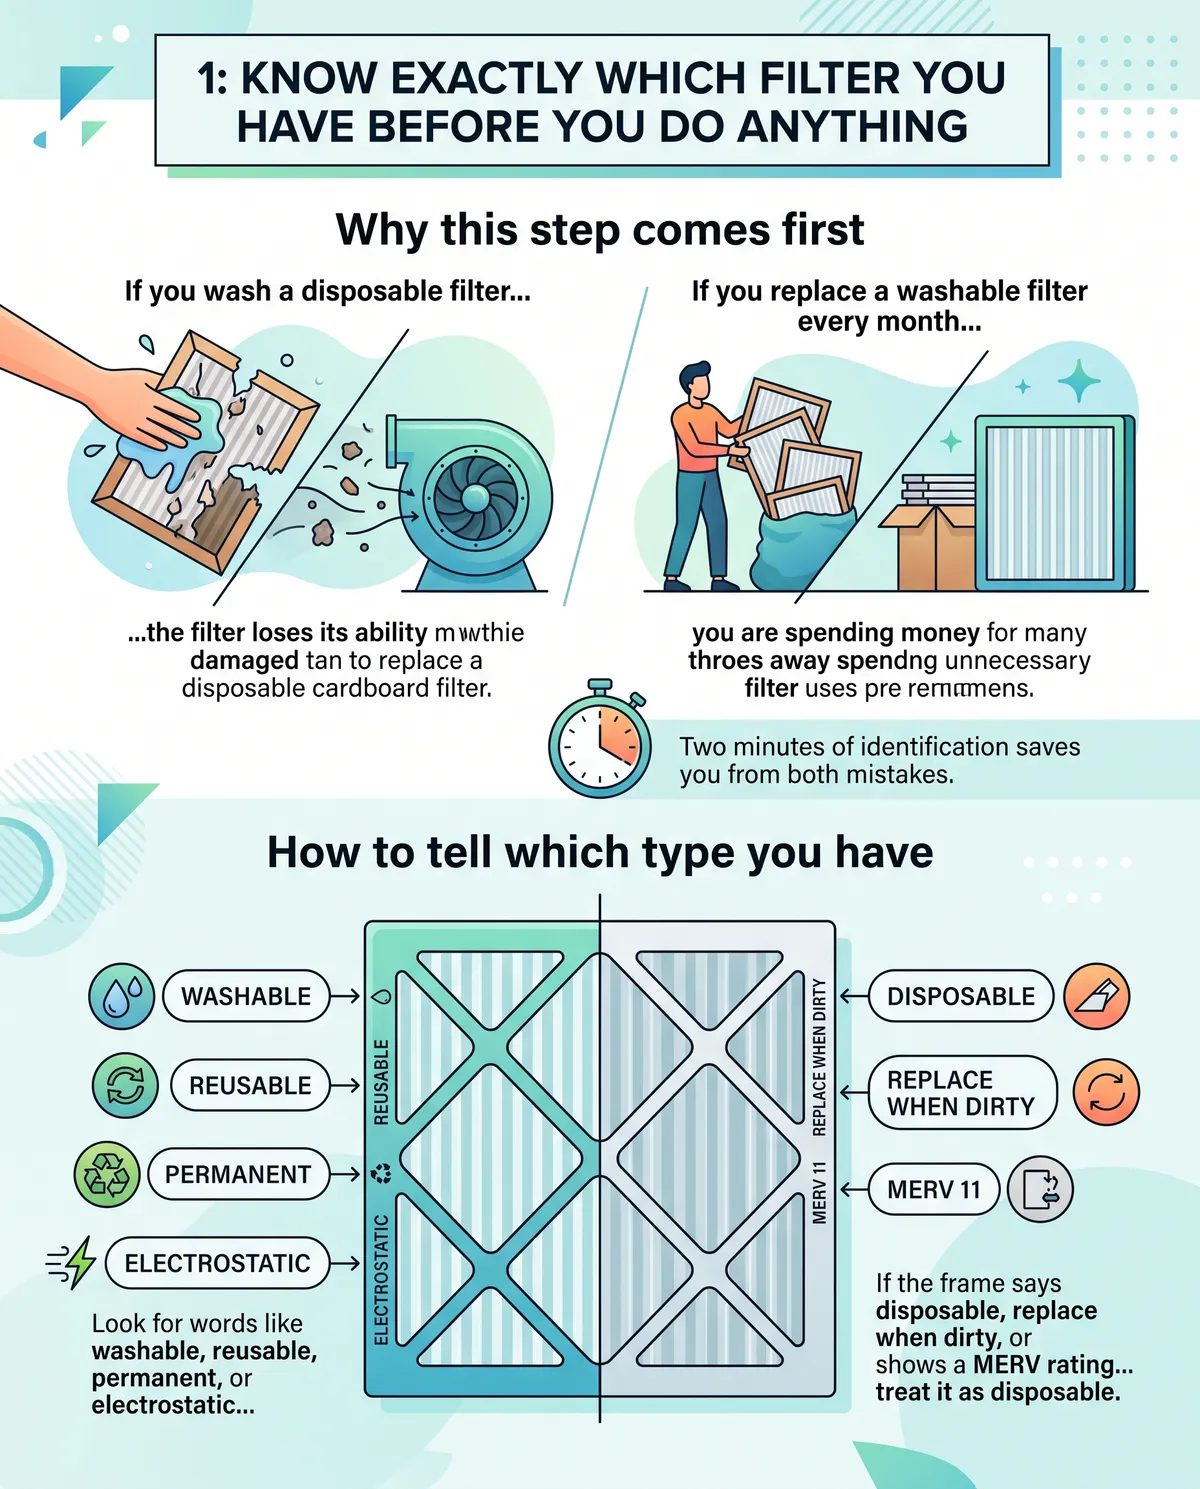
When cleaning an air filter, two minutes of identification saves you from both mistakes.
How to tell which type you have
The fastest method is to look at the filter frame itself. Most manufacturers print the filter type directly on the cardboard or plastic border. Look for words like washable, reusable, permanent, or electrostatic on one side of the frame. If you see any of those words, you have a washable filter. If the frame says disposable, replace when dirty, or shows a MERV rating with no reuse language, treat it as disposable.
If the frame gives you no clear answer, check your HVAC system's owner's manual. The manual will list the recommended filter type and part number. If you do not have the manual, search the model number printed on your air handler or furnace. That number is usually on a sticker inside the access panel or on the side of the unit.
What to verify before moving on
Check these four things before you go any further.
- Confirm the filter type using the frame label or the manual.
- Note the filter size. It is printed on the frame as three numbers, such as 16x25x1 or 20x25x4. Write it down or photograph it. You will need it if you are buying a replacement.
- Look for an airflow arrow on the frame. This arrow shows which direction air is supposed to move through the filter. You will need to reinstall the filter in the same orientation.
- If your manual specifies a MERV rating or a particular brand, note that too. Using a filter with a MERV rating that is too high for your system can restrict airflow and strain the blower motor.
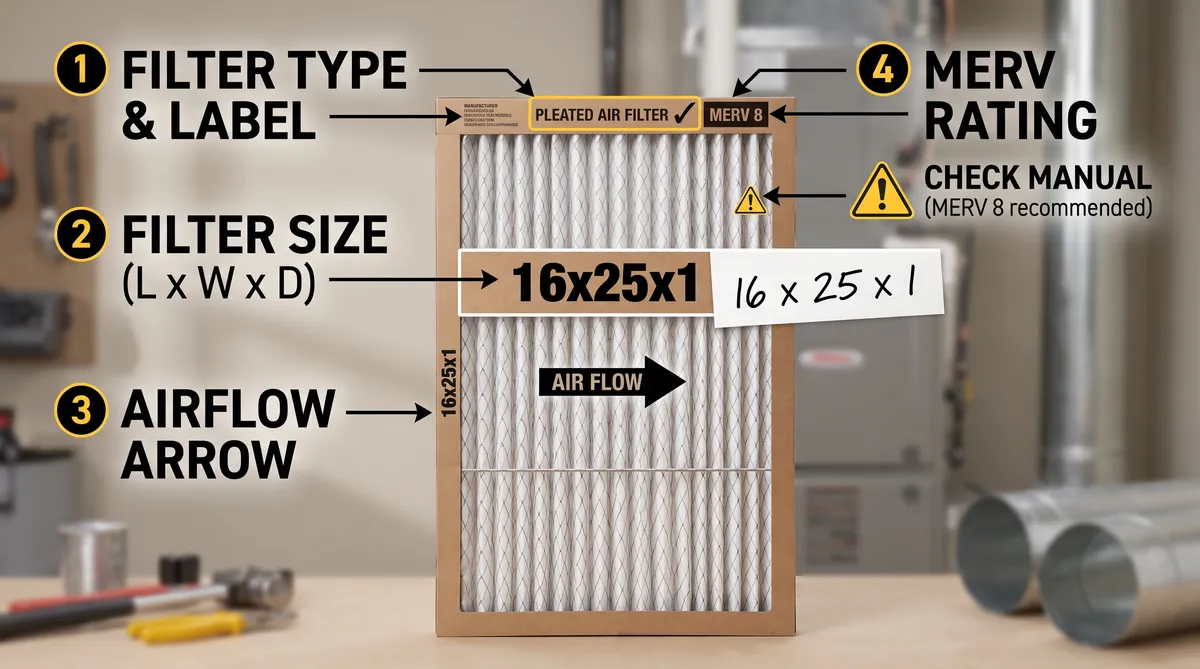
Confidence checkpoint-cleaning an air filter
You are ready to move to the next step when you can answer these three questions without hesitation about cleaning an air filter.
- Do you know whether the filter is washable or disposable?
- Do you know the filter size?
- Do you know which direction the airflow arrow points?
If any answer is uncertain, go back and check before continuing.
SECTION 2: GET READY IN TWO MINUTES SO THE JOB STAYS SIMPLE
What you need will need when cleaning an air filter for HVAC
The supplies for this task are minimal. Gather everything before you start so you are not hunting for things mid-job.
For a washable filter you need access to a sink, bathtub, or outdoor hose, a soft brush or your hand for rinsing, and a clean dry towel or a space where the filter can air dry completely.
For a disposable filter you need a replacement filter in the correct size and MERV rating, a trash bag for the old filter, and optionally a vacuum with a brush attachment to clean the filter slot before inserting the new one.
For either type you may want a flashlight to see inside the filter housing, and a piece of tape and a marker to note the installation date on the filter frame.
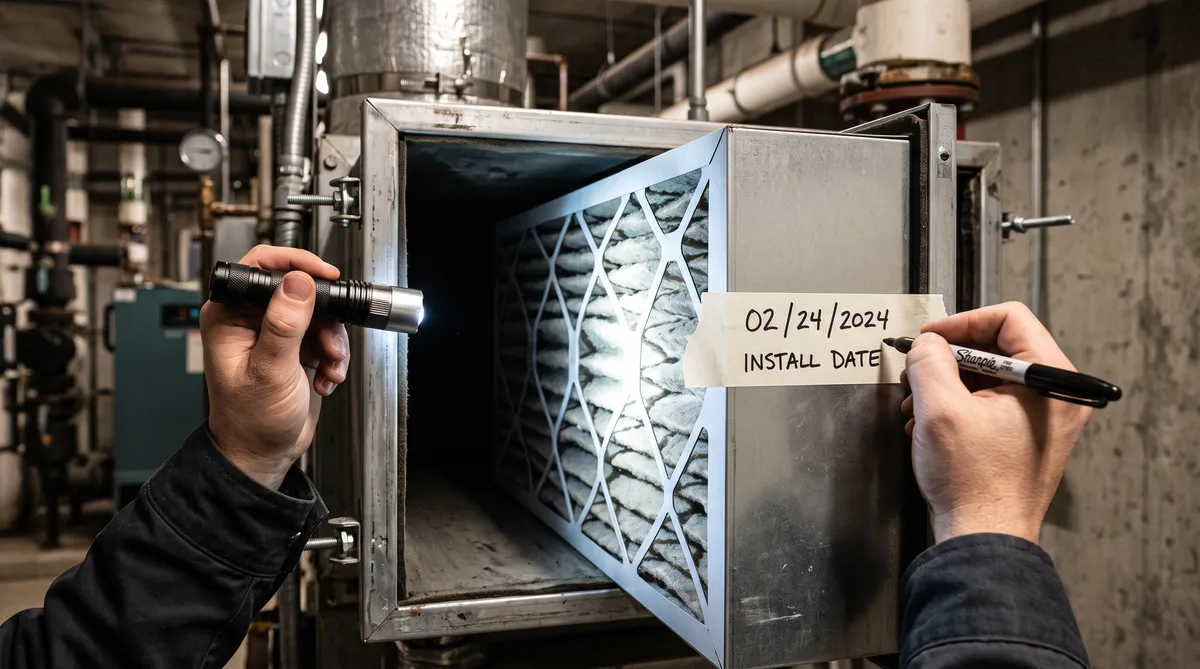
One optional step that pays off
Before you remove the old filter, use your phone to take a photo of the filter in its current position. This gives you a reference image showing which direction the airflow arrow is pointing and how the filter sits in the slot. If you are ever unsure during reinstallation, you have a picture to check.
SECTION 3: REMOVE THE FILTER WITHOUT SECOND-GUESSING YOURSELF
Turn off the system first
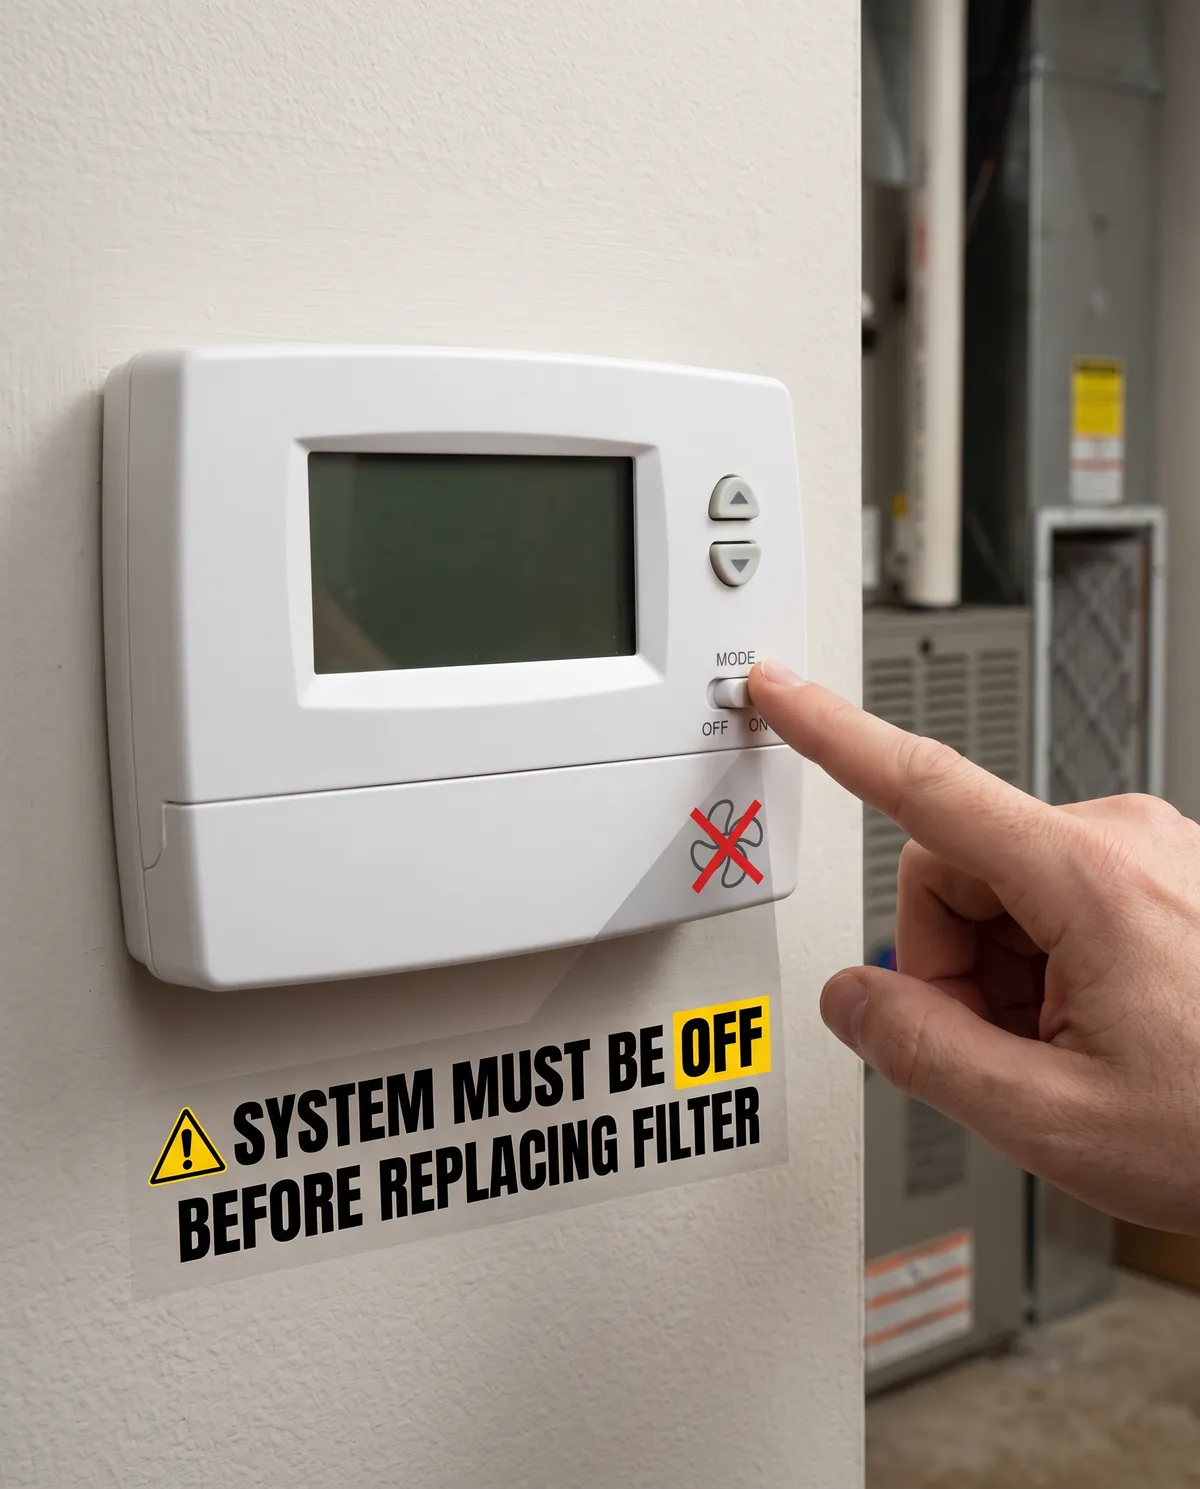
This step is not optional. Before cleaning an air filter, shut off your central AC or HVAC system at the thermostat before you open the filter housing. Running the system with the filter removed pulls unfiltered air through the blower and can deposit dust and debris on the evaporator coil. Cleaning a coil is a much larger job than cleaning a filter. Turn the system off, confirm it has stopped running, and then proceed.
Find the filter
Central AC filters are located in one of three common places.
- The most common location is the return air vent, which is a large grille mounted on a wall or ceiling inside your home. This grille is usually larger than a standard supply vent and does not blow air out. It pulls air in. The filter sits just behind this grille.
- The second common location is inside the air handler or furnace itself. The air handler is the indoor unit of your system, typically located in a closet, basement, attic, or utility room. There is usually an access panel on the side or bottom of the unit. The filter slides into a slot just before the blower compartment.
- The third location, less common in older homes, is a dedicated filter cabinet installed in line with the return air duct. These cabinets are designed to hold thicker filters, often four or five inches deep.
If you are not sure where your filter is, start at the largest return air grille in your home. That is the right place to look in the majority of residential central AC systems.
How to open the housing and remove the filter
For a return air grille, look for two or four screws on the face of the grille, or a latch on one side that allows the grille to swing open. Some grilles have no screws and simply pull away from the wall with light pressure. Once the grille is open, the filter will be visible directly behind it. Slide it straight out.
For an air handler access panel, look for a latch, a screw, or a panel that lifts off. Once the panel is open, the filter slot is usually visible immediately. Slide the filter straight out in the direction opposite to the airflow arrow.
Handle the filter carefully. Old filters carry dust, pet dander, pollen, and other particles. Slide it out slowly and keep the dirty side facing up or away from your face. If the filter is heavily loaded, consider wearing a dust mask.
Confidence checkpoint-cleaning an air filter
You have the filter in your hands, the system is off, and you remember which direction the airflow arrow was pointing. You are ready to move to the cleaning or replacement step.
SECTION 4: CLEAN IT CORRECTLY IF IT IS MEANT TO BE REUSED
Who this section applies to for cleaning an air filter
Follow this section only if you confirmed in Section 1 that your filter is washable, reusable, or electrostatic. If your filter is disposable, skip to Section 5.
What washable filters actually do
Washable filters, sometimes called permanent or electrostatic filters, use layers of woven or charged material to capture particles. They are designed to be rinsed and reused many times. The trade-off is that they typically have a lower MERV rating than high-quality disposable filters, meaning they capture larger particles well but may allow finer particles to pass through. For most homes, they perform adequately and reduce ongoing filter costs.
Step-by-step cleaning process
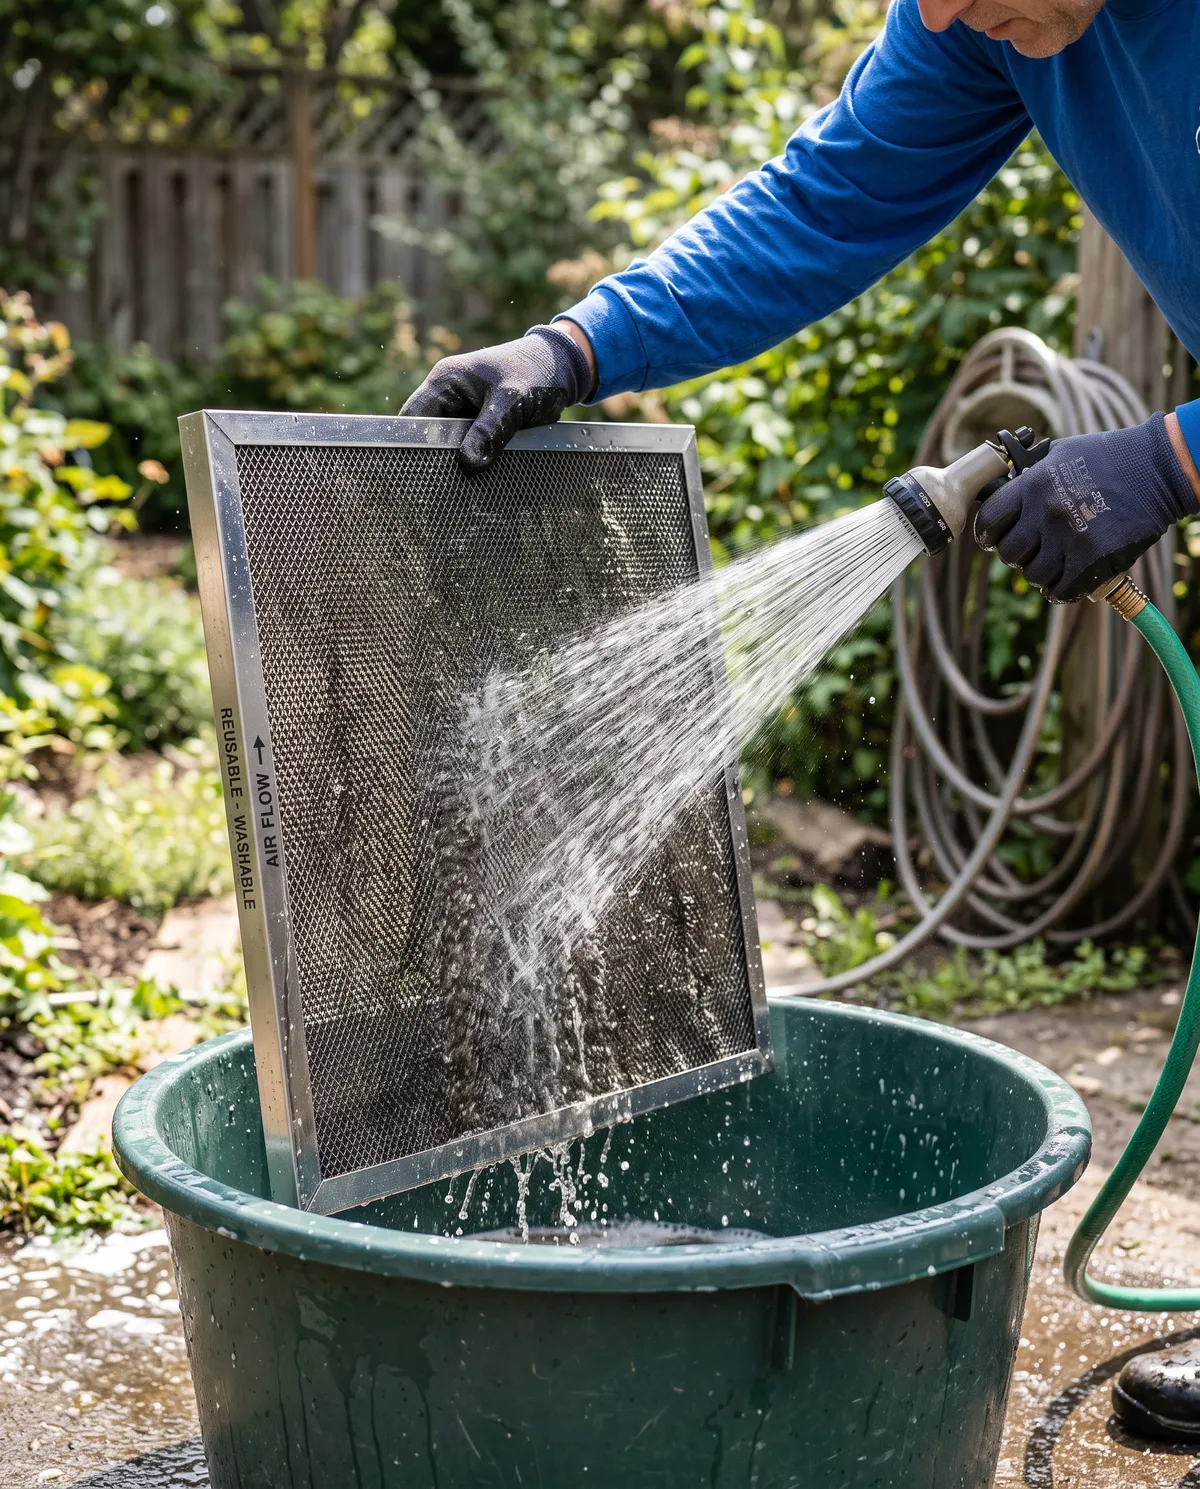
Take the filter to a sink, bathtub, or outdoor area where you can rinse it with running water.
Tap the filter gently against the inside of a trash can or the ground to dislodge loose dust before wetting it. This prevents the dust from turning into a paste when wet.
Rinse the filter with lukewarm water. Start from the clean side and rinse toward the dirty side. This pushes debris out the same way it came in rather than deeper into the filter media. Use low to moderate water pressure. High pressure from a pressure washer can damage the filter material.
If the filter has visible buildup that rinsing alone does not remove, apply a small amount of mild dish soap to the filter surface and work it in gently with your fingers or a soft brush. Rinse thoroughly until no soap remains. Soap residue left in the filter can affect airflow and may attract dust more quickly.
Shake off excess water and set the filter in a clean area to air dry completely. Do not use a hair dryer, place it in direct sunlight for extended periods, or put it back while it is still damp. A damp filter restricts airflow and can promote mold growth inside the duct system. Depending on humidity and filter thickness, drying can take one to several hours.
How to know it is clean enough
Hold the dry filter up to a light source. You should be able to see light passing through the filter media relatively evenly. If large sections appear blocked or the material looks matted and compressed, the filter may be at the end of its useful life even if it is technically washable. Most washable filters last several years with proper care, but they do not last forever. Check the manufacturer's guidance for the expected lifespan of your specific model.
Confidence checkpoint- cleaning an air filter
The filter is clean, fully dry, and you can see light passing through it. You are ready to reinstall it.
SECTION 5: REPLACE IT CORRECTLY IF IT IS DISPOSABLE
Who this section applies to:
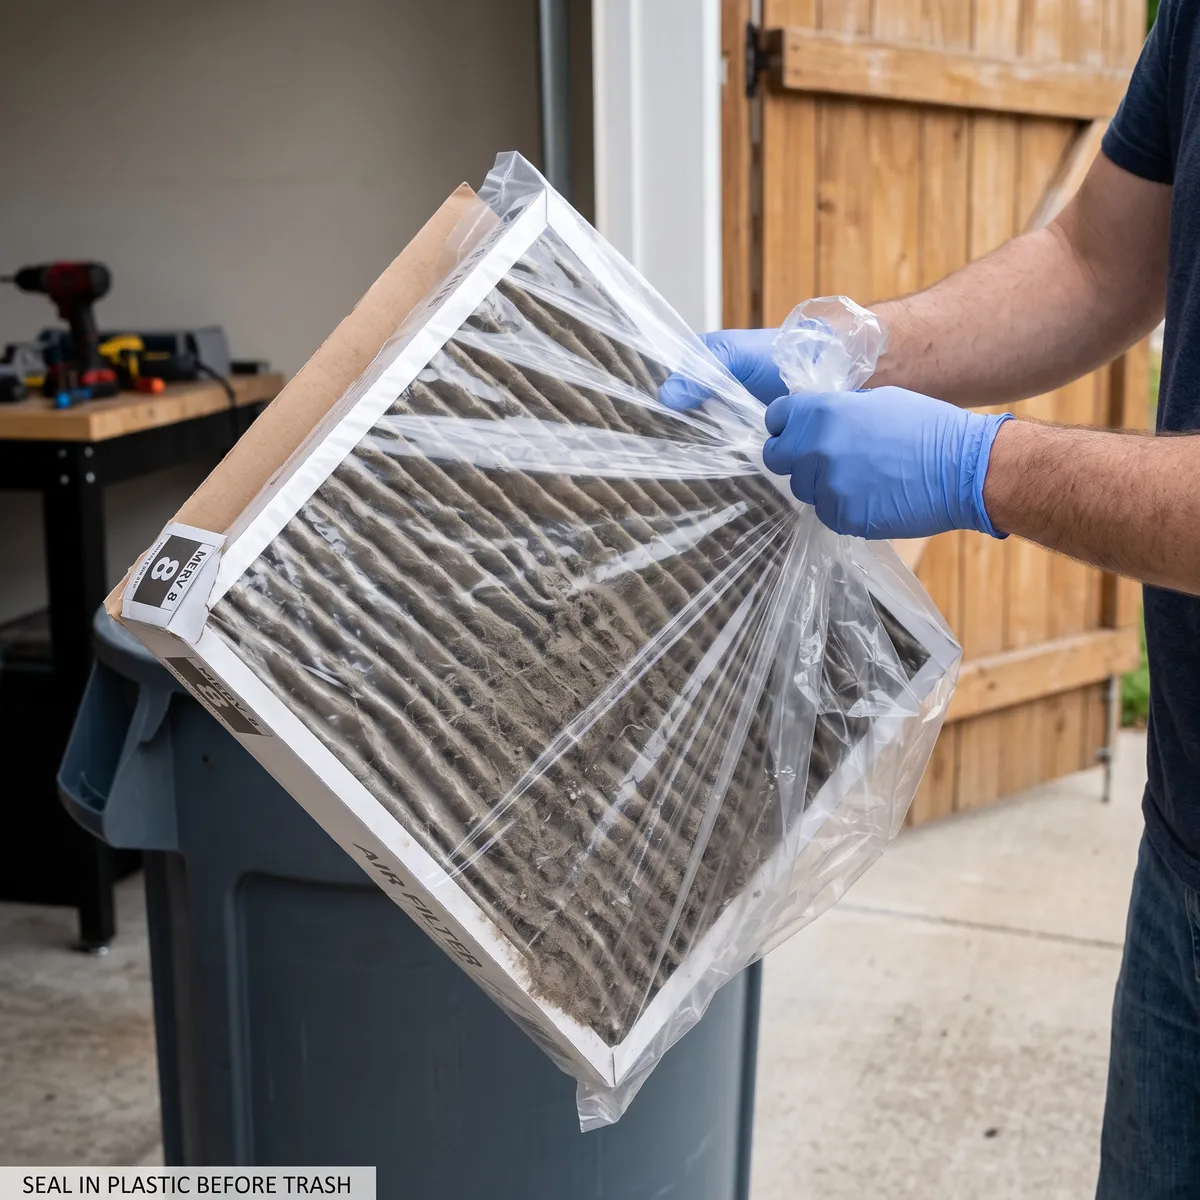
Follow this section if your filter is disposable. This includes fiberglass filters, pleated paper or polyester filters, and any filter without reuse language on the frame.
Why disposal matters
A used disposable filter carries everything it has captured over its service life. Seal it in a plastic bag or wrap it in the bag your new filter came in before placing it in the trash. This keeps the captured particles contained and out of your living space.
Choosing the right replacement
Match the replacement filter to the size printed on the old filter frame. The three numbers represent nominal length, width, and thickness in inches. Buying the wrong size is one of the most common mistakes. A filter that is too small leaves gaps around the edges. A filter that is too large will not fit into the slot. Neither protects your system effectively.
For MERV rating, most residential systems work well with filters rated between MERV 8 and MERV 13. MERV 8 filters capture most common household particles including dust, pollen, and mold spores. MERV 11 and MERV 13 filters add finer particles and some allergens. Filters rated MERV 14 and above are typically designed for commercial or medical settings and can restrict airflow in standard residential systems unless the system was specifically designed for them.
If your system's manual specifies a MERV rating range, stay within that range. If you are unsure, MERV 8 or MERV 11 is a safe choice for most homes.
Confidence checkpoint- cleaning an air filter
You have a new filter in the correct size and an appropriate MERV rating. You know which direction the airflow arrow needs to point. You are ready to install it.
SECTION 6: PUT EVERYTHING BACK AND KNOW YOU DID IT RIGHT
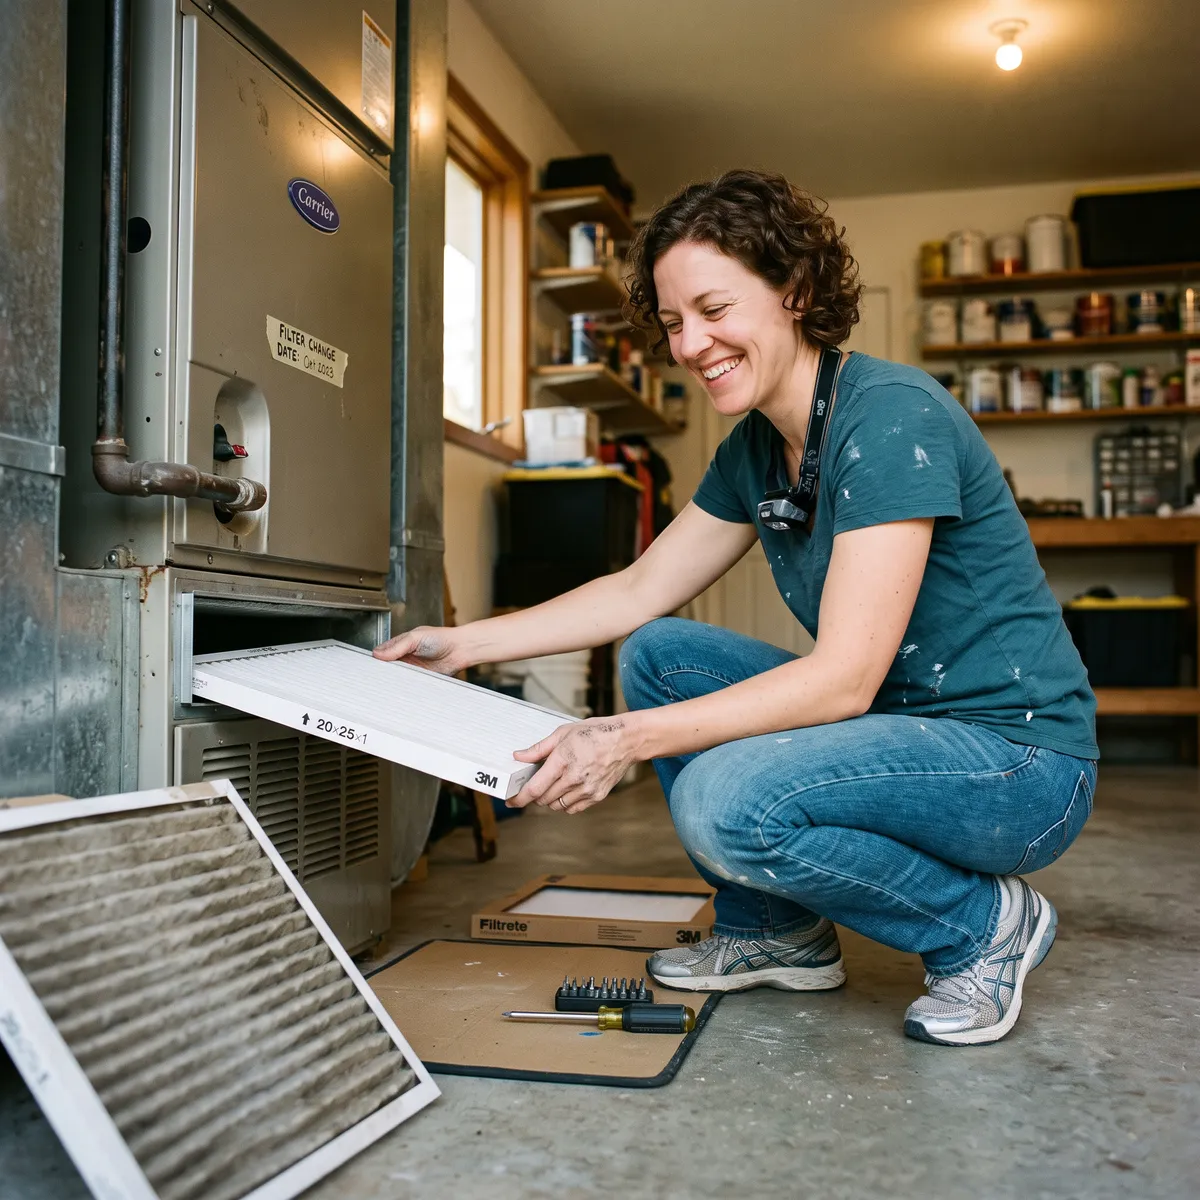
Installing the Filter
Slide the filter into the slot with the airflow arrow pointing toward the blower, which means pointing away from the return air duct and toward the air handler. If you took a photo in Section 2, compare your installation to that photo before closing the housing.
The filter should fit snugly with no visible gaps around the edges. If you see gaps, check that you have the correct size. A small amount of flex in the filter frame is normal, but the edges should make contact with the slot on all four sides.
Close the access panel or grille securely. If the panel has screws, replace them. If it has a latch, confirm it is fully engaged. An unsecured panel can rattle during operation and in some cases can be pulled partially open by the negative pressure inside the return air system.
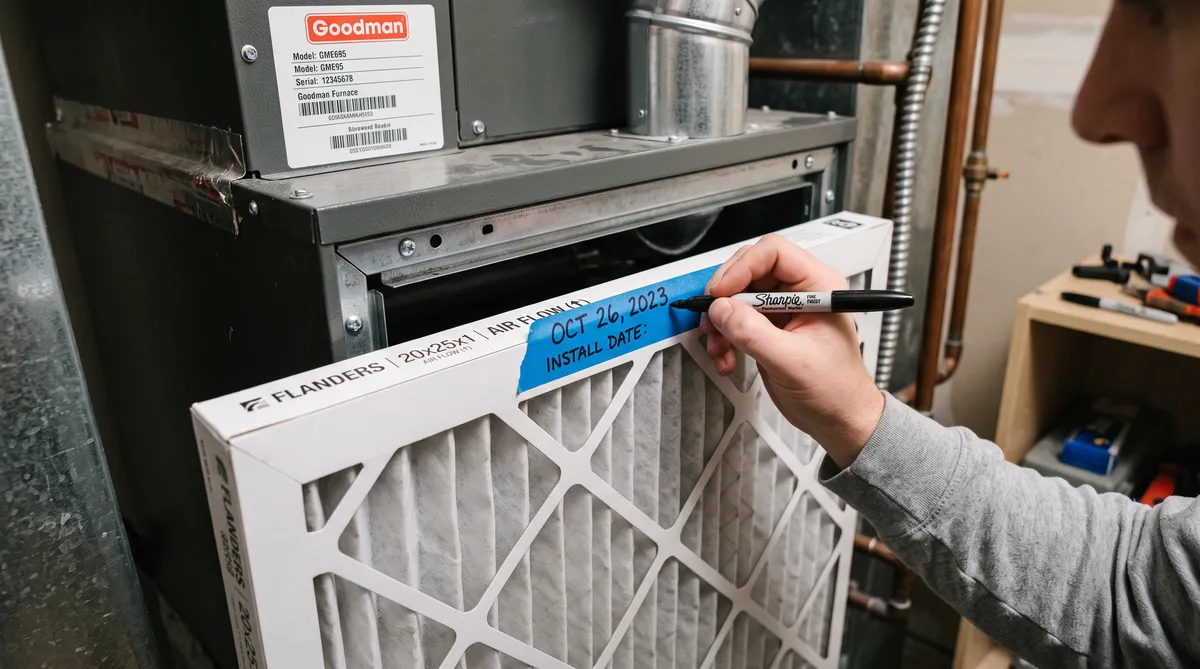
Mark the installation date
Write the date on the filter frame with a marker, or apply a small piece of tape with the date written on it. This takes ten seconds and removes all guesswork the next time you check the filter. You will know immediately how long the current filter has been in service.
Turn the system back on
Return to your thermostat and restore normal operation. Listen for a moment. The system should sound the same as it did before. If you hear unusual rattling or notice that airflow from your supply vents seems weaker than before, turn the system off and check that the filter is seated correctly and the access panel is fully closed.
Confidence checkpoint- cleaning an air filter
The filter is installed in the correct direction, the housing is closed, the date is marked, and the system is running normally. The job is complete.
SECTION 7: WHY CLEANING AN AIR FILTER IN YOUR HVAC UNIT HELPS YOUR HOME RUN SMARTER
The connection between a clean filter and system efficiency
Your central AC system moves air continuously when it is running. The filter is the only barrier between the return air stream and the internal components of the system. When the filter becomes clogged, the blower has to work harder to pull air through it. That increased resistance raises energy consumption without improving comfort. The US Department of Energy notes that replacing a clogged filter with a clean one can reduce your air conditioner's energy consumption by five to fifteen percent.
Beyond energy costs, a clogged filter allows more particles to accumulate on the evaporator coil. A dirty coil transfers heat less efficiently, which means the system runs longer to reach the set temperature. Longer run times mean more wear on the compressor, which is the most expensive component in the system to repair or replace.
How often to check the filter.
A general guideline is to check the filter every thirty days and replace or clean it every sixty to ninety days for a typical home. Homes with pets, residents with allergies, or homes in areas with high dust or pollen levels may need more frequent changes, sometimes every thirty days. Homes with no pets, few occupants, and good air quality may go longer between changes.
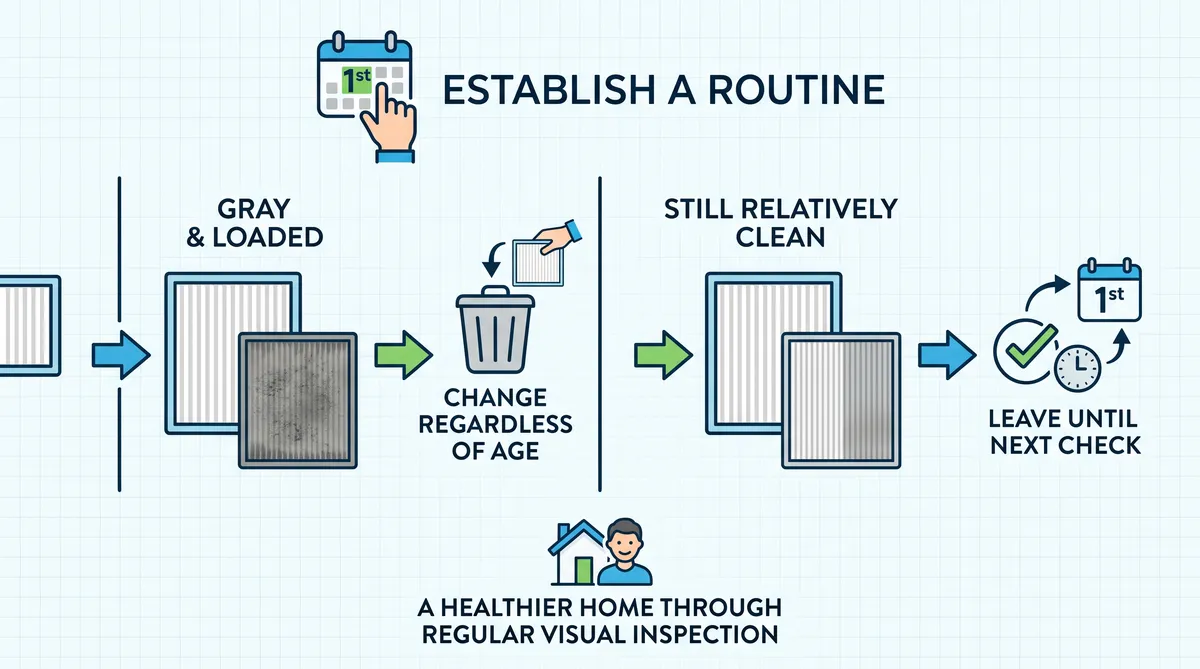
The most reliable approach is to check the filter on a fixed schedule, such as the first day of each month, and make the decision based on what you see. A filter that looks gray and loaded should be changed regardless of how recently it was installed. A filter that still looks relatively clean can stay in place until the next check
The environmental case for washable filters
If reducing household waste is a priority for you, a quality washable filter is worth considering. A single washable filter can replace dozens of disposable filters over its lifespan. The upfront cost is higher, but the long-term material waste is significantly lower. The trade-off is that washable filters generally have lower MERV ratings than the best disposable options, so they may not be the right choice for households with significant allergy or air quality concerns.
The bigger picture
Filter maintenance is one of the few home tasks where a small consistent effort produces measurable results in comfort, energy costs, and equipment longevity. It requires no professional help, no special tools, and no more than fifteen minutes. Done regularly, it is one of the highest-return maintenance habits available to a homeowner.
SECTION 8: FREQUENTLY ASKED QUESTIONS
What happens if I run my system without a filter?
Running the system without a filter allows unfiltered air to pass directly over the evaporator coil and into the blower. Dust and debris accumulate on the coil and in the blower housing. A dirty coil loses efficiency and can eventually cause the system to freeze up or fail. Even running the system without a filter for a single day can deposit enough debris to affect performance. Always have a filter in place when the system is operating.
Can I use a higher MERV filter than my system recommends?
Using a filter with a MERV rating significantly above what your system is designed for can restrict airflow enough to strain the blower motor and reduce system efficiency. If you want better filtration, check your manual for the maximum recommended MERV rating and stay at or below that level. If your manual does not specify, MERV 11 is a reasonable upper limit for most standard residential systems.
My filter looks clean after only two weeks. Do I still need to change it?
If the filter looks clean, it is probably still doing its job. Check it again in another two weeks. The visual check is a reliable indicator for most filter types. The goal is to change or clean the filter before it becomes so loaded that it restricts airflow, not on a fixed calendar schedule regardless of condition.
How do I know if my filter is the right size?
The correct size is printed on the frame of your current filter. If the frame is damaged or unreadable, measure the filter slot opening with a tape measure. Note that filter sizes are nominal, meaning the labeled dimensions are slightly larger than the actual filter dimensions. A filter labeled 20x25x1 will measure approximately 19.5 by 24.5 by 0.75 inches. This is normal and expected.
Can I wash a disposable pleated filter to extend its life?
No. Pleated disposable filters use a paper or polyester media that collapses when wet. Washing them destroys the structure that makes them effective. A washed disposable filter may appear intact but will no longer capture particles at

Scott LeDuc is a master electrician who writes about practical smart-home upgrades that cut utility bills and reduce waste. Across more than 15 years in renewables, he has personally installed hundreds of energy and automation systems and managed thousands more through his business. He holds Master Electrician licenses in several states and OSHA 10 and 30 training. Find more at seamlesshome.com. Everything he shares is tested in his own home.